Authentication
By Default, we are using Firebase for auth, if you want to change it to Jwt for that follow below steps.
Global App Setup with Authentication, Theme.
// -----------------------------------------------------------------------------------------
// File : src/main.tsx
// -----------------------------------------------------------------------------------------

import { Suspense } from 'react';
import { createRoot } from 'react-dom/client';
import './css/globals.css';
import App from './App.tsx';
import Spinner from './views/spinner/Spinner.tsx';
import { CustomizerContextProvider } from './context/CustomizerContext.tsx';
import './utils/i18n.ts';
import { SidebarProvider } from './context/SidebarContext/index.tsx';
import { AuthProvider } from './guards/auth/AuthContext.tsx';

createRoot(document.getElementById('root')!).render(
  <CustomizerContextProvider>
    <SidebarProvider>
      <Suspense fallback=<Spinner />>
        <AuthProvider>
          <App />
        </AuthProvider>
      </Suspense>
    </SidebarProvider>
  </CustomizerContextProvider>,
);
1. Jwt Method
For JWT, incipiently change in AuthContext.tsx file as per below mention.
// -----------------------------------------------------------------------------------------
// File : src/guards/auth/AuthContext.tsx
// -----------------------------------------------------------------------------------------
interface InitialStateType {
  isAuthenticated: boolean;
  isInitialized: boolean;
  user: any | null;
  platform: 'Firebase' | 'Supabase' | 'JWT' | null;
}

const initialState: InitialStateType = {
  isAuthenticated: false,
  isInitialized: false,
  user: null,
  platform: 'JWT',
};
2. Firebase Method
For firebase, incipiently change in AuthContext.tsx file as per below mention.For more details about Firebase: https://firebase.google.com/
// -----------------------------------------------------------------------------------------
// File : src/guards/auth/AuthContext.tsx
// -----------------------------------------------------------------------------------------
interface InitialStateType {
  isAuthenticated: boolean;
  isInitialized: boolean;
  user: any | null;
  platform: 'Firebase' | 'Supabase' | 'JWT' | null;
}

const initialState: InitialStateType = {
  isAuthenticated: false,
  isInitialized: false,
  user: null,
  platform: 'Firebase',
};
Steps for Generate key
- click on “Go to console” display on the right side on firebase account.
- Then after Click on add Project.
- After Display popup menu, Enter Project name, Select Country And Click on Terms and condition Checkbox.Click on Create Project Button.
- Now, Display The Firebase Admin panel
- In Left Panel, Click on Develop option. Now Click on authentication link.
- Click on the “Web Setup” button.
- Now, copy the configuration and change in MaterialM-react project in ‘src/components/Firebase/firebase.js’.
- Now go to sign-in Method tab.Enable Email/Password and Anonymous in sign-in providers.
- Now, Click on database link from left Panel.
- Click on the create a database button.
- Display Popup in Select “start in locked mode” and Click on Enable Button.
- Now, select real-time Database.
- Click on rules tab. change the read and write rules from false to true.

How to add key into template ?
// -----------------------------------------------------------------------------------------
// File: src/guards/firebase/Firebase.tsx
// -----------------------------------------------------------------------------------------
const firebaseConfig = {
  apiKey: 'API_KEY',
  authDomain: 'AUTH_DOMAIN',
  projectId: 'PROJECT_ID',
  storageBucket: 'STORAGE_BUCKET',
  messagingSenderId: 'SENDER_ID',
  appId: 'API_ID',
  measurementId: 'M_ID',
  databaseURL: 'DATABASE_URL',
};
3. Supabase Method
Folders And Files
Create .env file
// this is your .env file
VITE_SUPABASE_URL="YOUR_VITE_SUPABASE_URL"
VITE_SUPABASE_ANON_KEY="YOUR_VITE_SUPABASE_ANON_KEY"
Inside that folder you will get this file src > guards > supabase > supabaseClient.ts
import { createClient } from '@supabase/supabase-js';

const supabaseUrl: string | any = import.meta.env.VITE_SUPABASE_URL;
const supabaseKey: string | any = import.meta.env.VITE_SUPABASE_ANON_KEY;

export const supabase = createClient(supabaseUrl, supabaseKey);
Platform Configuration
// -----------------------------------------------------------------------------------------
// File : src/guards/auth/AuthContext.tsx
// -----------------------------------------------------------------------------------------
interface InitialStateType {
  isAuthenticated: boolean;
  isInitialized: boolean;
  user: any | null;
  platform: 'Firebase' | 'Supabase' | 'JWT' | null;
}

const initialState: InitialStateType = {
  isAuthenticated: false,
  isInitialized: false,
  user: null,
  platform: 'Supabase',
};
Steps for Generate key
- Go to “https://supabase.com/
- click on "Sign Up" or "Log In" and complete the process.
- On the dashboard, click on the "New Project" button.
- After Display popup menu, Enter Project name, Select Country.Click on Create Project Button.
- Once your project is created, go to the Project Dashboard.
- In Left Panel, Now Click on authentication Tab.
- By default, Email & Password authentication is enabled, which allows users to sign up and sign in using their email and password.
- You can also enable OAuth Providers like Google, GitHub, Twitter, etc.
- In the Settings tab under Authentication, you can customize email templates for user verification, password reset emails, and more.
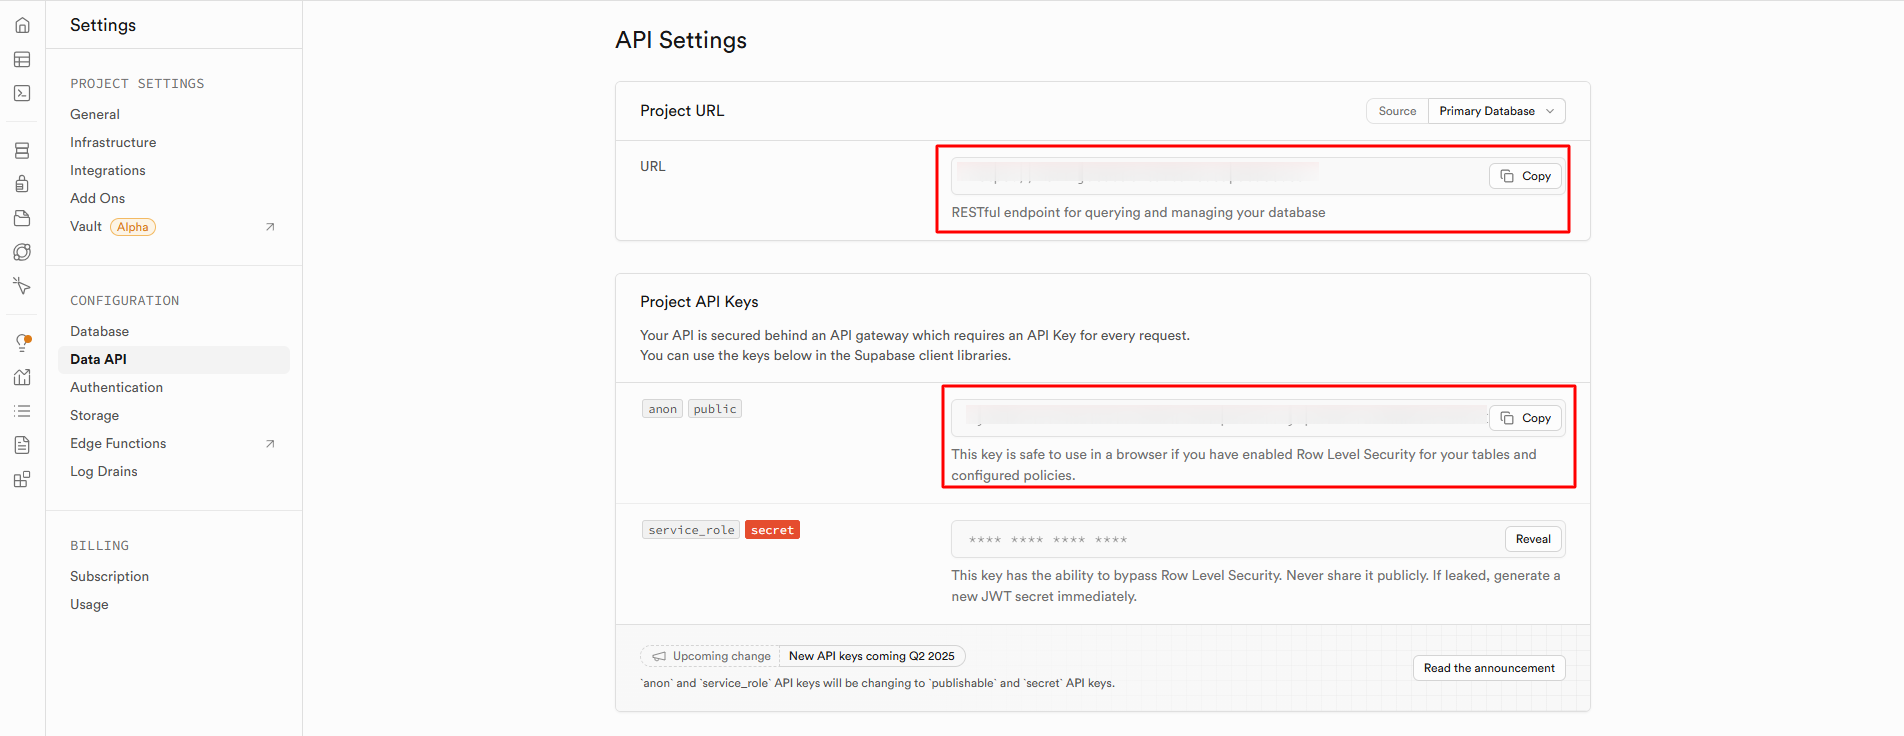
- Now, From the left sidebar, click on API.
- Poject Url: This is used for client-side authentication, to interact with your Supabase project. Copy this URL.
- Anon Key: This is used for client-side authentication, Copy this key.
- Install Supabase : npm install @supabase/supabase-js
- Create an .env File to Store Your Keys
 // this is your .env file
VITE_SUPABASE_URL="YOUR_VITE_SUPABASE_URL"
VITE_SUPABASE_ANON_KEY="YOUR_VITE_SUPABASE_ANON_KEY"
import { createClient } from '@supabase/supabase-js';

const supabaseUrl: string | any = import.meta.env.VITE_SUPABASE_URL;
const supabaseKey: string | any = import.meta.env.VITE_SUPABASE_ANON_KEY;

export const supabase = createClient(supabaseUrl, supabaseKey);